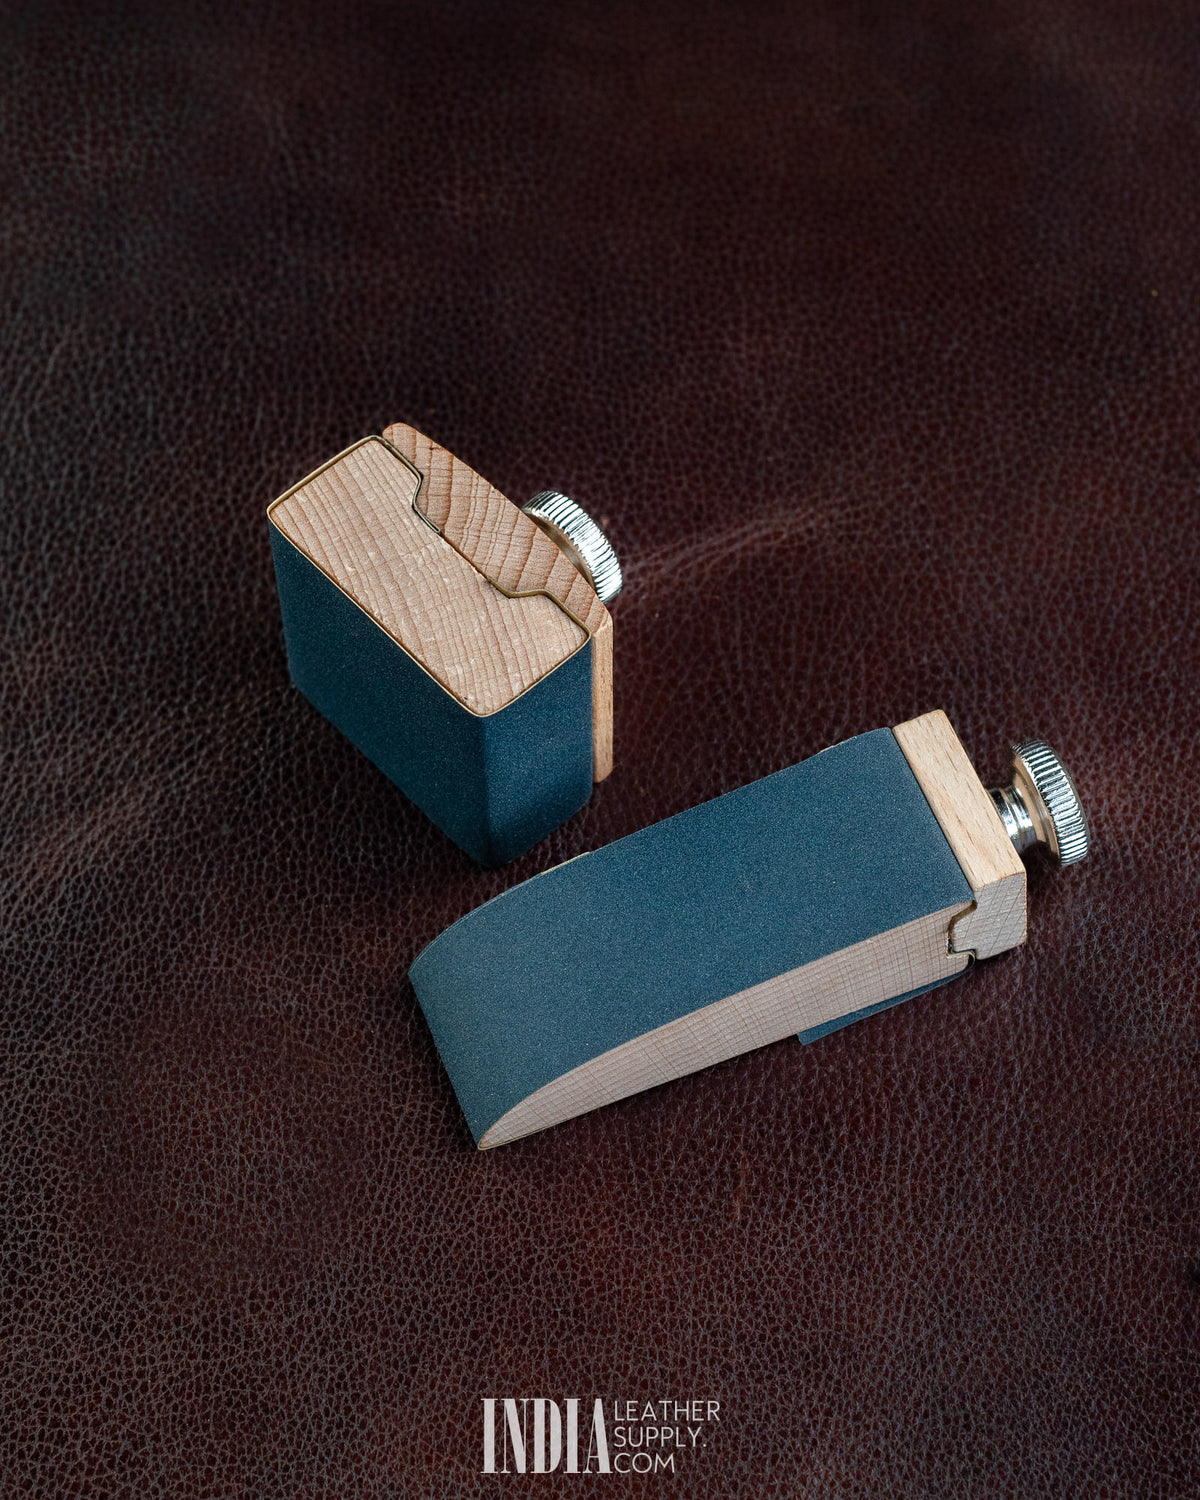


Leather Sanding Block
Leather Sanding Block
Couldn't load pickup availability
A hardwood block that holds a strip of sandpaper tight and flat, so you can sand a leather edge straight and square instead of rounding it over with your fingertips. It is the step between cutting and burnishing that makes the biggest difference to how an edge looks: layers that line up, no saw-tooth from the knife, and a smooth surface ready to bevel and polish.
Each block is made in two parts that meet at a stepped joint. A strip of sandpaper wraps around the block, its ends are trapped in that joint, and a knurled thumbscrew draws the two parts together to lock the paper in place. Changing to a fresh strip, or a finer grit, takes seconds and needs no tools. Choose the shape that suits your work, or keep both on the bench.
Choosing a Shape
🔺 Wedge (~90 × 30 × 25 mm)
A long block that tapers to a narrow nose. The flat sides handle straight edges, and the tapered end reaches into inside curves, corners, cut-outs and handle slots where a square block cannot go.
⬛ Square (~50 × 45 × 29 mm)
A compact, flat block that sits firmly in the palm. Best for long straight edges and outside curves, where a wide flat face keeps the edge level across every layer.
Key Features
📐 Sands Square, Not Round
A rigid backing keeps the sandpaper flat against the edge, so glued layers end up flush and the edge stays square to the face.
🔩 Thumbscrew Clamp
The paper is clamped between the two halves of the block, so it cannot slip, bunch up or tear away mid-stroke.
🔄 Tool-Free Paper Changes
Loosen, swap the strip, tighten. Easy to work through coarse to fine grits on the same edge.
🪵 Hardwood Body
Light and comfortable to hold, and firm enough to give the sandpaper a true, flat backing.
Loading the Sandpaper
Cut a strip. Cut sandpaper to the width of the block and long enough to wrap around it.
Open the block. Loosen the thumbscrew until the two parts of the block separate at the joint.
Wrap. Wrap the strip around the block with the abrasive side out, and lay both ends into the joint between the two parts.
Tighten. Pull the strip snug and tighten the thumbscrew so the parts close on the paper and it sits flat with no slack.
Where It Fits in Edge Finishing
Level the edge. After glueing and trimming, sand the edge with a coarser grit until all the layers are flush and the knife marks are gone.
Bevel. Take the corners off with an edge beveller, such as our Edge Beveller (Japanese Style).
Smooth. Switch to a finer grit and sand lightly to blend the bevel into a rounded edge.
Burnish. Finish with a burnishing compound like Tokonole and a Wooden Leather Burnisher.
💡 Tips for a Clean Edge
✓ Keep the block upright. Hold it square to the face of the leather so the edge does not end up sloping to one side.
✓ Long, even strokes. Sand along the full length of the edge rather than scrubbing one spot, which leaves dips.
✓ Work up through the grits. Coarse to level, fine to smooth. A finer finish before burnishing gives a glassier edge.
✓ Refresh the paper often. Clogged sandpaper polishes rather than cuts. Swap in a fresh strip as soon as it slows down.
Specifications
| Specification | Wedge | Square |
|---|---|---|
| Size (L × W × H) | ~90 × 30 × 25 mm | ~50 × 45 × 29 mm |
| Body | Hardwood, two-part with stepped joint | |
| Clamp | Knurled metal thumbscrew | |
| In the Box | One block in the shape you choose. Sandpaper not included. | |
Workshop Grade Tools: Small variations in wood grain and colour, minor surface marks or light handling marks may be present. These are natural or cosmetic and do not affect how the block performs.
Share